How Many People Will a 3 Lb Rotissary Chicken Feed
Is there anything a rotisserie chicken can't do? It has become the Swiss-army knife of the home kitchen. Delis and meat departments of even moderately-stocked supermarkets now sell them in little characteristic bags or plastic carriers, and they have woven themselves into the fabric of the American dinnertime. They are used for chicken salad, chicken tacos, chicken enchiladas, chicken croquettes, and, yes, they are used as roast chicken.
Here, we'll look at what it takes to make your own rotisserie chicken at home. Yes, the rotisserie is a specialized piece of equipment that not everyone has, and we acknowledge that fact, but if you have a rotisserie for your grill—or even a stand-alone rotisserie oven—we have the temperature tips you need to make a bird that far outshines than the ones at the store.
Why cook a rotisserie bird at home?
Store-bought rotisserie chickens are the very apex of convenience. They're relatively cheap and they're ready to go when you need them. So why make one at home? Well, control, for one thing. You can get the highest quality chicken available, one that hasn't been injected with a 5% solution of whatever they wanted—maybe even a heritage breed chicken from your local farmers' market. The point is, you can get a chicken you trust.
But beyond that, there are other advantages to home-cooking a rotisserie chicken. Seasoning, for one, which you get to customize. The smell, which you get to fill your neighborhood with. And, of course, the skin.
When you buy a rotisserie chicken at the store, unless you get it super fresh and get it home super fast, the skin is going to lose its crispness. It'll still be well seasoned, but it won't have the bacon-y crunch that a home-spun chicken will. And oh, what skin! The constant self-basting of the rendering fat gives the bird a deep, russet gold and a crispness that plays so well against the rich fattiness. It's a culinary delight of tremendous caliber.
Is it as convenient as a store-bought bird? No way! But convenience isn't why you love grilling and barbecue, is it? And this chicken is worth the (still rather small) effort.
White vs. dark meat: a thermal play
Just like on a turkey, the light and dark meat of a chicken are best cooked to two separate temperatures. Light breast meat is like a steak—tender, lean, and better if not overcooked—while dark thigh meat is more like a chuck roast or brisket, full of connective tissue that needs to be broken down, but juicy and tender once it's properly done.
White meat is best cooked to a pull temp of about 157°F (69°C) so that it doesn't dry out, but thigh and leg meat is better around 175°F (79°C) or higher. While that wide temperature difference may not always be achievable, there is a trick that we can use to get quite close: ice the breasts.
By letting the chicken sit on the counter with a bag of ice on the breasts for a half-hour or so before you cook, you allow the thigh meat to come up to a warmer temperature while maintaining a colder breast temp. The temperature differential you achieve before roasting will carry through some of the cook, so that the breasts end up cooler than the thighs in the finished bird, as well—an ingenious little trick.
When it comes to gauging the doneness of both the breast and the thigh meat, remember that slitting the meat open to check if the juices "run clear" is not an accurate way to ever check a chicken! Using a fast and accurate thermometer, however, most definitely is.
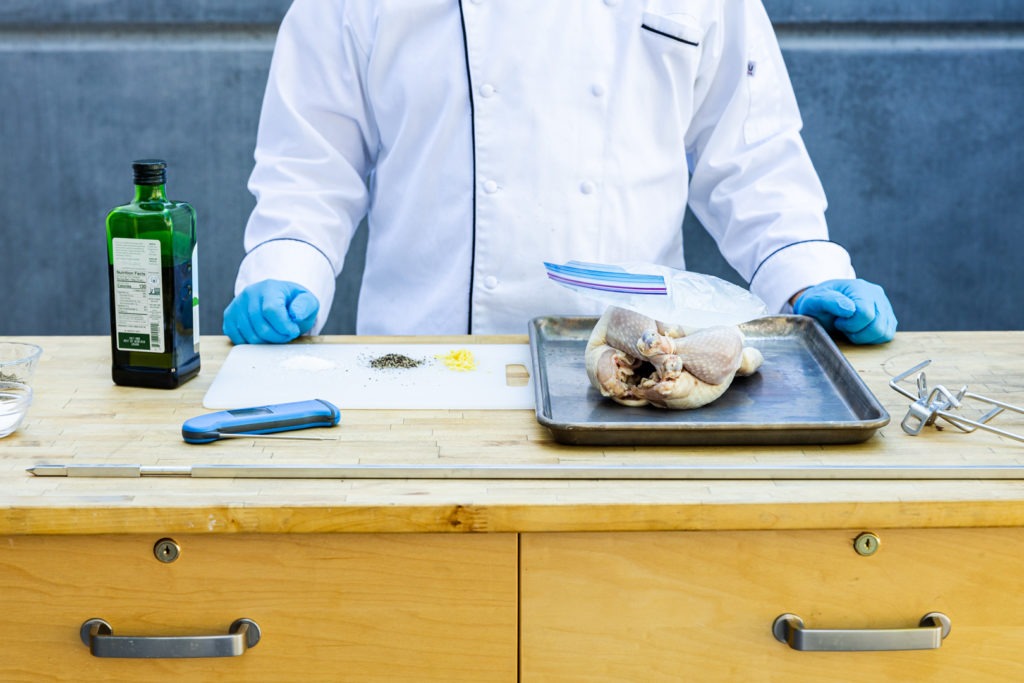
How to season a rotisserie chicken
There's no set seasoning for a rotisserie chicken, so you can use your imagination to season yours according to what you like. We seasoned ours just with simple salt, pepper, and lemon zest, and in many ways, that's about as good as it gets! Not only is that flavor combination excellent on its own, but it also goes well with anything you might want to use the chicken for, later on. It will go into a Greek pita as well as it will a Mexican tortilla soup.
No matter how you season it, be sure to get some seasoning under the skin of the breasts. Doing so provides a deeper flavor to both the meat and the skin.
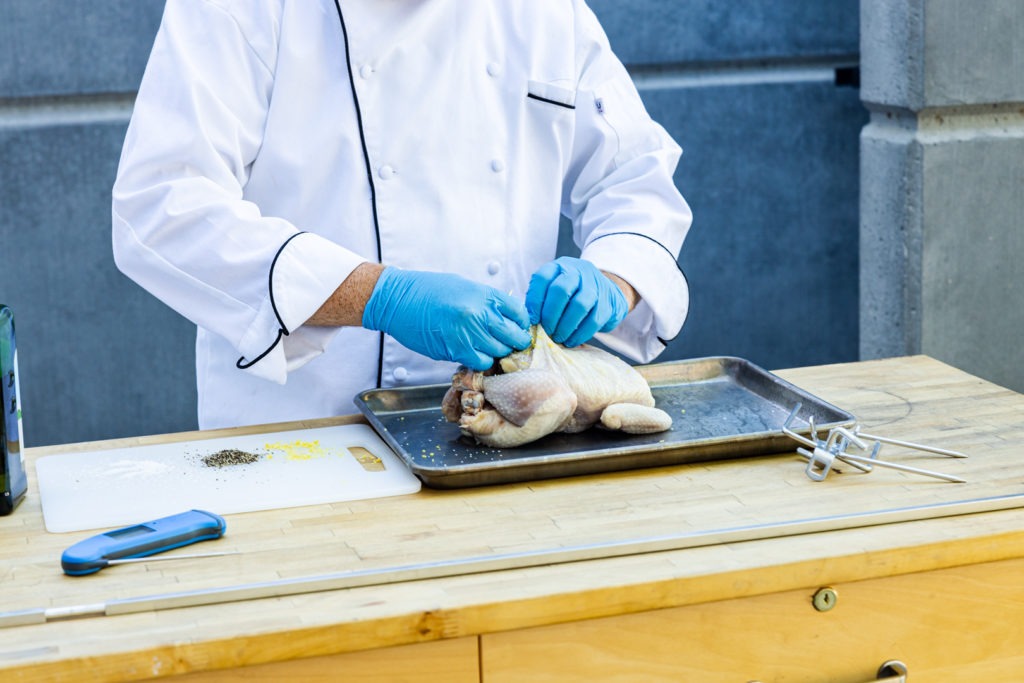
Note: a quick rub with some olive oil on the skin will also help it crisp up and brown better.
How to cook a rotisserie chicken
First, set up the rotisserie according to its instructions. In our case, that meant heating the whole grill on high, including the rotisserie burner, for about 15 minutes, then turning off the center burners (the ones right under the chicken) and turning the outside burners to medium/medium-high. Some may balk at the idea of this indirect cooking, but think back to your ideas of what a rotisserie is like. If you're thinking of the same images that I am, then the meat is often suspended a few feet above a live fire. It's not hot enough to scorch it immediately if the spinning stops, and we want the same basic environment here.
(If you're using a charcoal grill, have two piles of charcoal, one on each side of the chicken, but none directly beneath it. The same high-but-indirect heat is still what you want.)
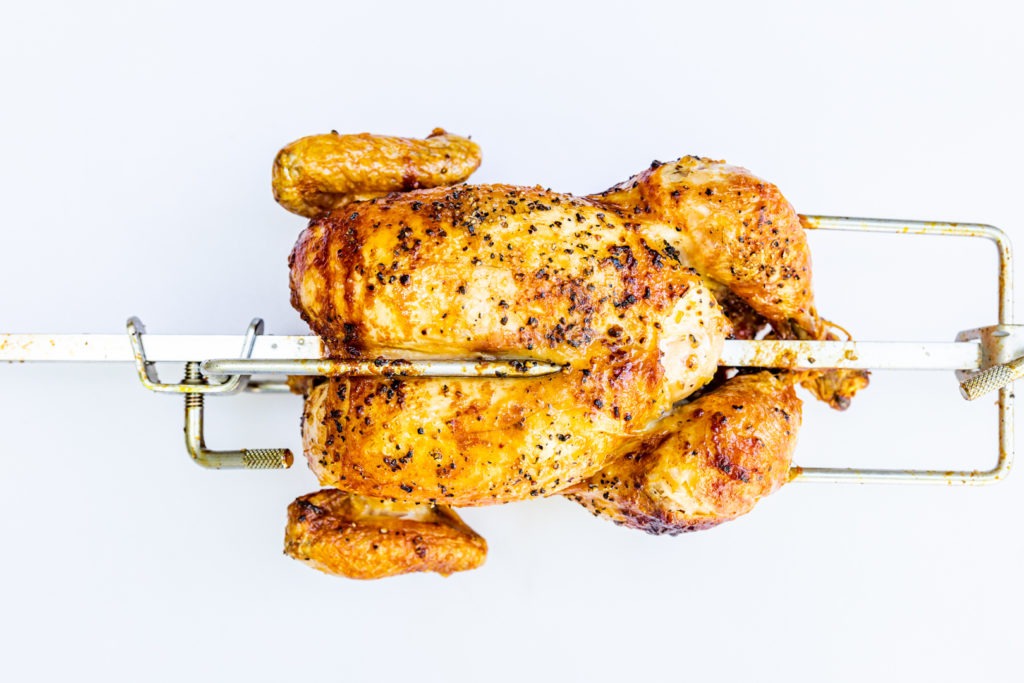
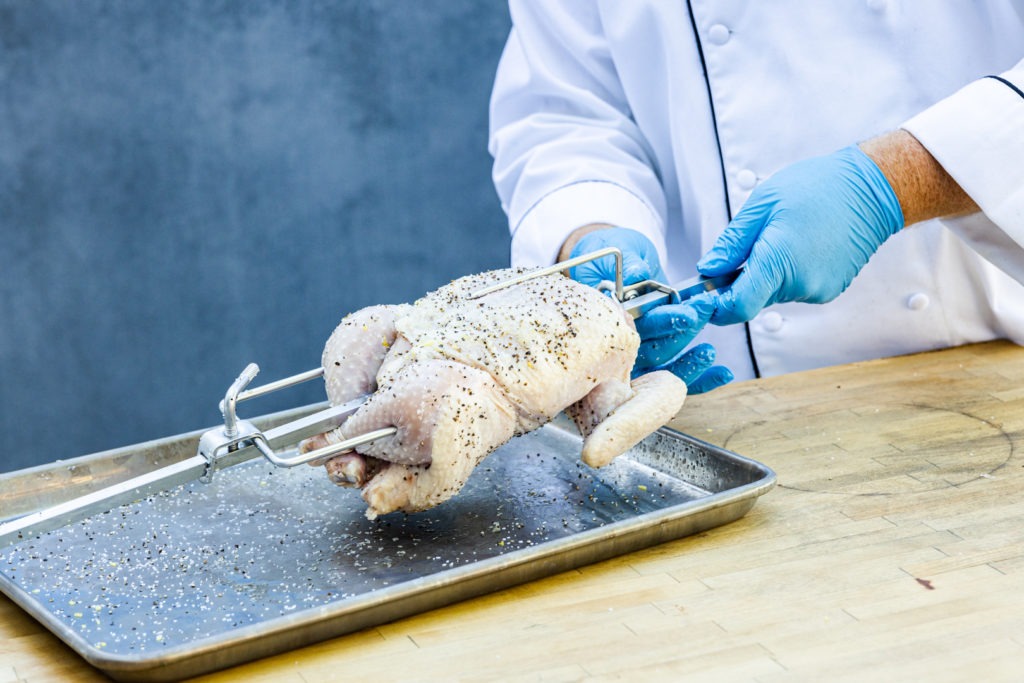
With the grill prepared, skewer your chicken with the spit and hold it in place with the proper instruments, like the tines that we used here.
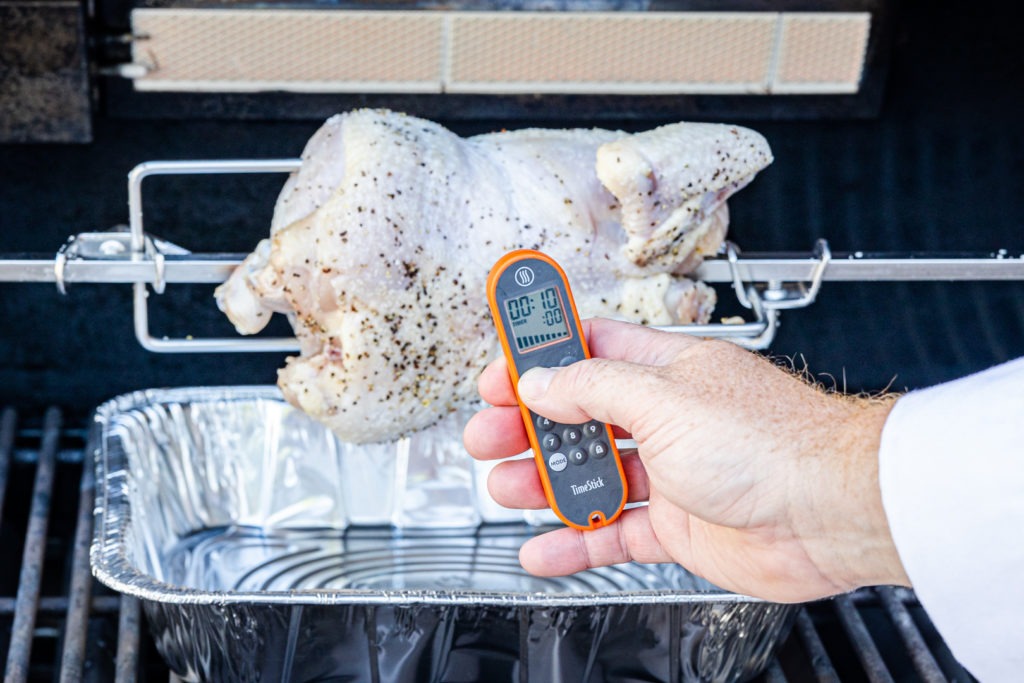
Then set it in your rotisserie and start it up! Because juices and fat will be leaking out of this bird, it's best to put a drip tray underneath it so that you don't get flare-ups or, since the section of the grill directly under our bird was turned off, a super greasy mess on the grill burners. If you have a rotisserie burner at the top back of your grill, only use it for the first ten minutes of cooking, then shut it off. It serves to jump-start the rendering of the fat and the browning of the skin, but keeping it on through the whole cook is too much direct, high heat.
Temping a rotisserie chicken
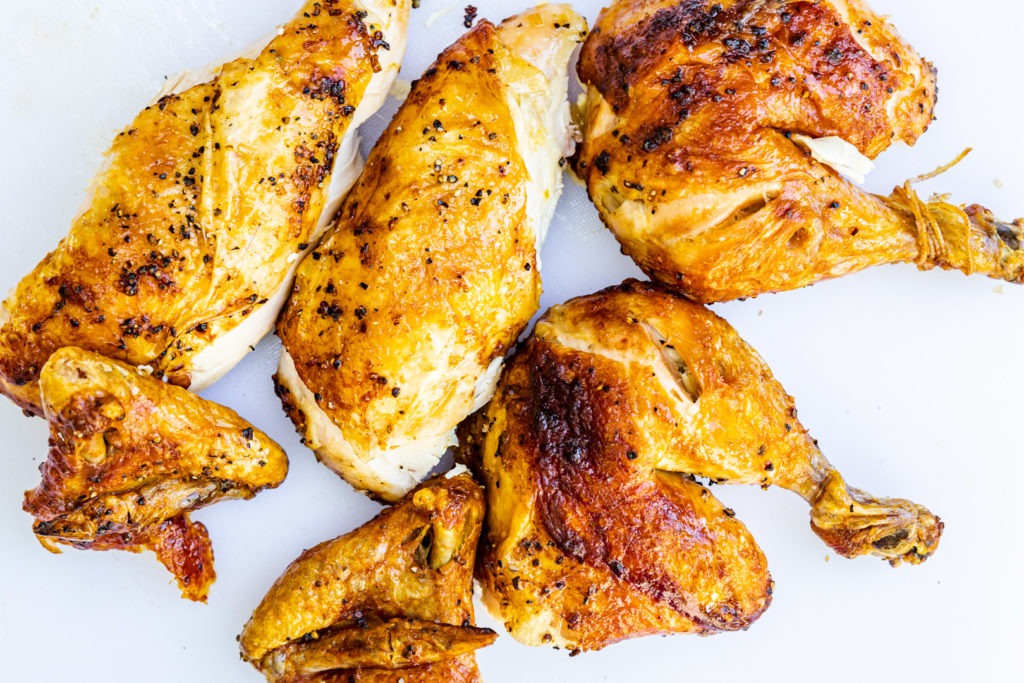
To temp a rotisserie chicken, turn off the rotisserie and use a Thermapen ® to check both the breast and the legs. It's so easy. Start temping when the chicken has been cooking for about 12–15 minutes per pound, then about every 5 minutes after that. If the chicken's lowest temperature reads 157°F (69°C), get that chicken off the grill! The meat will continue to carry-over cook for a couple minutes, so get it off the heat before 160°F (71°C) or the breasts will dry out. The skin will be crisp, the meat will be juicy, and it will be delicious. Carve it up and dig in!

Recap:
- Season your chicken how you like, but seasoning it simply will be just fine.
- Let it sit on the counter with a bag of ice on the breasts for a half-hour before cooking.
- Preheat your grill properly before cooking and prepare it for a high-but-indirect heat.
- Temp your chicken with a Thermapen starting at about 12–15 minutes per pound of chicken.
- Cook your bird to 157°F (69°C). The breasts should be cooler than the thighs because of the icing, so the lowest temp in the whole bird ought to be in the breast.
- Enjoy!
With some thermal thinking and some careful monitoring via the Thermapen, you can have the best rotisserie chicken you've ever had. Bring on the summer!
Shop now for products used in this post:

Source: https://blog.thermoworks.com/chicken/rotisserie-chicken-at-home/
Posting Komentar untuk "How Many People Will a 3 Lb Rotissary Chicken Feed"